Sharing my search for inexpensive crafts, craft storage and general craft therapy!

Showing posts with label craft storage. Show all posts

Thursday, February 16, 2012

Craft Candy

I love seeing all of the creative ways that crafters store their goodies.  I especially love to see them stored in pretty glass jars.  I call it craft candy...so yummy.


But, true to my blog name, I do not want to spend a lot on those pretty glass jars.
Here are the ones I found for my craft room. 


All but the jars in the last picture are from the Dollar Tree.
These are not something they keep in stock and they go fast.
Be on the look out at your local store.  They are worth the wait!


I use them to store silk flowers, ribbons, buttons and other odds and ends.
They make me smile just to look at them and certainly serve as inspiration.

I could find more space-efficient storage, but it would probably make my product less visible.
I need visibility to remember to use my stash!  Besides...jars are so pretty!


The jars in the next picture are from Walmart (bottom back), clearance Bazzils through DollarScrapbooking.net and, obviously, old baby food jars.  Wish I could get more baby food jars but my kids are 9.  Baby food jars make great small flower storage.

Wish I hadn't bought the Walmart jars - got them before finding the ones at the Dollar Tree - they were $1.99 each which is not bad but not great considering they are smaller than the ones I got for $1.
Oh well.  They are still nice.


I hear a lot of folks get jars from Ikea.  They have a nice selection - especially if you want something really large, but Dollar Tree is generally cheaper for small to mid-sized jars.
Goodwill and other thrift stores are also a great option.

Looking at my pics here, I'm thinking, hmmmm....my jars could use a little more bling.  Guess I need to break out some pretty tag supplies and make some labels.  So many Skrimp N Skrap projects, so little time!

Saturday, February 11, 2012

Pushing My Comfort Zone


I've been doing some "sperimentin'" lately.  I totally love cards and scrapbook pages with lots of ephemera and pattern mixes done by other people but when I work on my own, I stick with simple, symmetrical, matchy-matchy and, well, boring.  With the best of intentions, I will pile on a bunch of embellishments and patterns and then...slowly take them away, one by one, until I am back to simple, symmetrical, matchy-matchy and, well, boring.

I say, BORING NO MORE!  I am committed to interesting.  I am committed to leaving the multiple patterns and the bunches of ephemera!  I refuse to listen to that symmetry-loving dictator in my head!

This card is the closest I have come to living this vision.  Notice the patterns!  Notice the off-set!  Notice the - gasp - completely unrelated use of purple in the flower, rhinestones and ribbon when it can be found no where on the paper!  Okay the dark stripes on the background paper are almost purple - but not quite.
This was a real stretch for me.  My twin daughters stood by my side, cheering me on as I permanently glued the pieces in place.  And, guess what?  I kinda like it.  So I still only put a couple embellishments on this card...baby steps, right?
Flower and sentiment:  thanks4oneyear from The Stamps of Life by Stephanie Barnard 

Thursday, February 9, 2012

Check These Out

As I mentioned in my welcome post, I am a Dollar Tree regular.  Here is totally why...

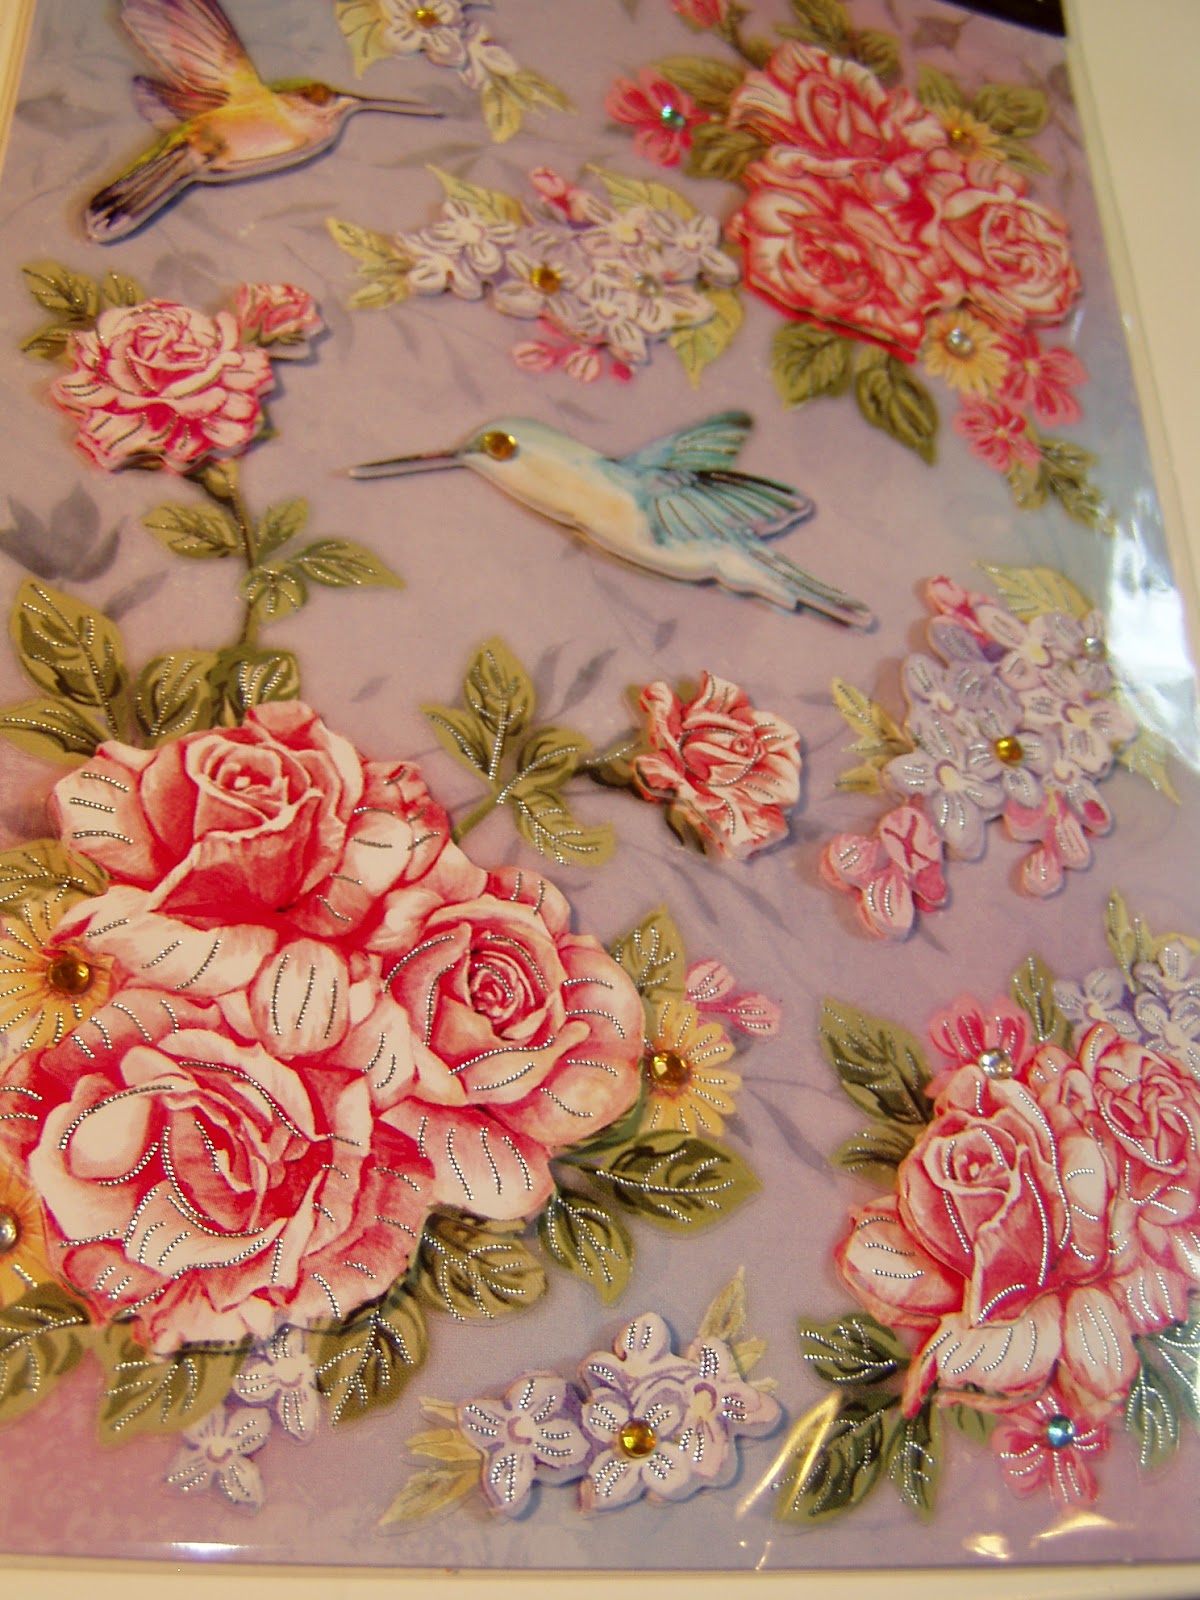
Got 8 packs of these dimensional stickers for a dollar a pack.  I think they are gorgeous.  I'm not the only one...as I was checking out, another shopper asked me where I got those beautiful stickers.  I happily told her.  And now I'm telling all of you...check out your local Dollar Tree often.  It is like a treasure hunt!

A closer look at each package:

How cute would these be on a simple card or scrapbook page?  Check out the dimension and detail in the larger photos below!

They are a great example on where you can save money to spend on other things.  Imagine what these cost in the big box craft stores.  I love those stores too, but they would bankrupt me if I bought this volume of stuff there!

Skrimp and Skrap!


Tuesday, February 7, 2012

I am a Stamps of Life Fan

Thought I'd share a quick card idea today.  This one is pretty simple but highlights a wonderful stamp design company...The Stamps of Life by Stephanie Barnard.  If you haven't checked them out, you really should.

Stephanie does a fantastic job both with her stamp designs and incredibly entertaining videos.  Her stamps are total "go to" tools for me and they are reasonably priced as well:  $10.95 each if you are a member and only $12.95 if not.


Stephanie's strength is designing stamps for multi-step stamping.  Most stamps sets come with an outline stamp and a matching background stamp for the primary design.  As you can see from the flower below, the set came with outlines as well as multiple petal/leaf patterns.  


I love the 3 dimensional effect possible with these stamps.  A little fussy-cutting and voila!  Now Stephanie is adding on dies for use with her stamps - even better!


Stephanie's stamps are an investment in versatile crafting.  There is no end to the possibilities using her products!  If you are looking for the sets used with this card, they are:

butterfly2build
creations2fill
flower2build

Sunday, February 5, 2012

Crafting Cred

As a new crafting blogger, it is time to build some Crafting Cred (like "street cred" just for crafts).  In other words, share some of my projects to prove I don't just collect (hoard), organize and store craft supplies.  (Although my daughter did express shock that I was willing to part with so much of my beloved stash to make this baby scrapbook!)

Here is an envelope mini that I built from left over invitation envelopes from my wedding (seventeen years ago).  They were still pristine white so I figure they are acid-free after all this time!

Please forgive the photo quality - I'm a crafter not a photographer but I promise to get better!

The envelopes were made from a white paper embossed with flowers and leaves.  I inked them with a pink pad, intending this to be a baby girl photo display.  I made all of the double mats from scrap paper I had on hand and then added some additional embellishments made from the same scrap paper.  Finally, I added rhinestones, crystals, ribbon, silk/felt flowers and metal fasteners from EK Success. 


All of the supplies were purchased on clearance/sale, from dollar stores or in bulk at the CKC convention.  The whole display probably cost me less than $3 not including my tools - which I also only buy dirt cheap (buy them cheap, not buy cheap tools - smile). Skrimp and Skrap!

Saturday, February 4, 2012

Welcome to Skrimp N Skrap

Well, I guess I am going to finally do it...I am going to blog!  I have been considering it for ages and have been enjoying the blogs of others for much longer.  It seems only fair for me to share some of my crafty ideas and not just lurk others!

A little about me...I am passionate about low-cost crafting - thus the name.  The Dollar Tree, 99 Cent Stores, Goodwill, Big Lots and Tuesday Morning are my very favorite haunts.  Oh...and Craigslist.  Craigslist is my addiction!  (Seriously, hubby is looking for a Craigslist Anonymous group for me.)  I have found some incredible hauls on Craigslist.

I am also passionate about low-cost, functional craft storage!  Seriously, I can repurpose and reuse with the best of 'em.  Most of my craft room consists of furniture that I no longer had use for elsewhere in my house.  Nearly all of my small storage containers are from the Dollar Tree or 99 Cent Store - and they are still seriously cute...at least I think so.

Anyway...so what will this blog be about?  To start with, I wanted to share some of my craft room solutions.  Some will look familiar as I stole the idea with pride from other blogs and YouTube videos. Others may be new and spark some ideas for all you crafters in the blogosphere.

Here is one that I am especially loving...


For the longest time, I kept my medium size brads and grommets in one of those typical craft containers.  It had divided sections but only one cover.  It was getting far too full and when I was looking for a specific piece, it would always fall to the bottom.  I would have quite a time digging it out and kept wishing I could just dump out the section.  Doing so would have meant dumping all the sections since it only had one cover - what a pain to re-sort! 

I remembered buying these small sealed food containers for my brother's bolts, nuts and screws.  I got them at the Dollar Tree - 10 per package.  I bought 9 packages and put them on their sides on this slide out shelf behind my desk.  I soon realized they would work great for a bunch of my other embellishments, too.

I just love this solution.  I can see everything I have - no more out of sight out of mind - and easily just grab out one container when needed.  The best thing is I can dump it on my desk and have minimal clean up!  Yes...I spent $9 but it is SOOOOO functional, provides TONS of space and is really no more expensive than much smaller units at the big box craft stores.

This is another new addition to my craft room.


I have a ton of 3-D stickers and embellishments that I had been storing by theme in 12x12 plastic drawers.  Trouble was, I didn't see them so I didn't use them.  Besides, the drawers were overflowing and jamming up every time I tried to open them.

My husband thought I couldn't possibly find another place to store anything in this room.  My response?  Wanna bet?  Any open wall space is OPPORTUNITY!  I had seen others install the Ikea Bygel rails around their rooms and then use the curtain clips you can also get at Ikea to hang up their embellishments.  Loved this idea.

Unfortunately, my craft room is an old, enclosed porch on our slump block house.  There isn't a lot of wall that is easy to drill in to.  Then I saw it...an opportunity above my window!  I hung a couple rails almost like a valance.  It is a little high, but I'm 5'11" so I can make it work.  I love it!  It is not only visible to remind me what I have but it is inspirational as well.

Some day, I'll show you an overview of my crazy craft room.  I call it the Kiddie Kubby.  (Do you think I'm fond of the letter "K"?)  It is 6' x 14' with an awkward area where it extends behind my library fireplace.  It used to be the area where I stored my kids' toys and at the back was a place for my cats.  The kids would just trash it and then played elsewhere so I decided to take it over.  The room is a bit of a mess right now and I'm too embarrassed to share pics...will have to be a later blog.

In the meantime, here is one more addition that I am enjoying.


I really like layouts and cards with sewing on them but I never remember to try it out myself.  Why?  Once again because I had stashed my sewing supplies in a cabinet where I didn't see them.  So, I found this lazy susan at Goodwill, put an old candle holder (also from Goodwill) on it to hold bobbins and a couple candle holders (Dollar Tree) beside it for other spools.  On the bottom of the lazy susan are a sewing kit and little, white buckets (Dollar Tree) that hold other small spools.  Now it serves as inspiration and a bit of color.  Still haven't sewed on a craft, though...that's my next project.

Well...got tons more I can post later plus a few Skrimp N Skrappy projects but I'll close for now.  Gotta get my kids to their music lessons.